NetApp System Administration
In this section I will talking about NetApp system adminstration, I will talk about disk administrator in another topic. Basically the NetApp filer is a Unix server highly tuned to deliver large amounts of storage, the hardware again is very similar to the computer that you have at home but will have extra redundancy features.
As you know the Operating Systems is called Data ONTAP which is based on Free BSD, you don't need to know a great deal about Unix in order to manage and setup a NetApp file, it comes with two excellent GUI tools one of which is web based but it would be worth while getting to know Unix for more problematic problems as you will need to use the commandline.
Generally the NetAPP filer will be setup when you receive it, it should have the latest Data ONTAP o/s installed and be ready to go, I am not going to go into much regarding the operating system.
Once you have your NetApp filer powered up and on the network, you can access it by any of the following common methods
| telnet/SSH | |
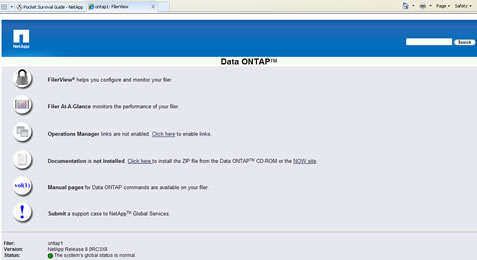
| Web Access GUI (http) | |
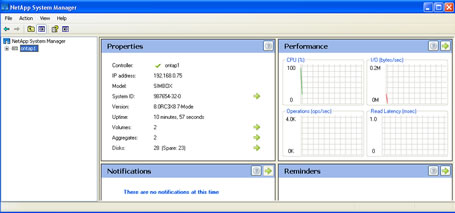
| System Manager (GUI) | |
I will only be using telnet (commandline) and the system manager in my examples.
There are a number of common session related parameters that you may wish to tweak, there are many more than below so take a peek at the documentation
| Help | ontap1> options ? |
| Telnet | ontap1> options telnet telnet.access legacy telnet.distinct.enable on telnet.enable off ## Enabling telnet access ontap1> options telnet.enable on |
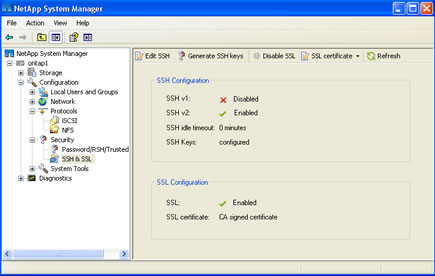
| SSH | ontap1> options ssh ## You can also use the secureadmin command to setup SSH/SSL
|
| HTTP | ontap1> options http |
| Session timeout | ontap1> options autologout ## Change the timeout values |
| Security | ontap1> options trusted trusted.hosts * ## Only allow specific hosts to administrate the NepApp filer ontap1> options trusted.hosts <host1>,<host2> |
System Configuration and Administration
NetApp filers have two privilege modes, the advanced privilege allows you to access more advanced and dangerous features
To set the privilege
| Privilege | priv set [-q] [admin | advanced] Note: by default you are in administrative mode |
You can use the normal shutdown or reboot command to halt or restart the Netapp filer, if your filer has a RML or BMC you can also start the filer in different modes
| startup modes |
Note: there are other options but NetApp will provide these as when necessary |
| shutdown | halt [-t <mins>] [-f] -t = shutdown after minutes specified |
| restart | reboot [-t <mins>] [-s] [-r] [-f] -t = reboot in specified minutes -s = clean reboot but also power cycle the filer (like pushing the off button) -r = bypasses the shutdown (not clean) and power cycles the filer -f = used with HA clustering, means that the partner filer does not take over |
When the filer boots you have a chance to enter the boot menu [Ctrl-C] which gives you a number of options, that allow you change the system password, put the filer into maintenance mode, wipe all disks, etc.
| Boot Menu | 1) Normal Boot.
|
To check what versions of Data ONTAP you have use the version command
| Data ONTAP version | version [-b] -b = include name and version information for the primary, secondary and diagnostic kernels and the firmware |
I am not going to talk much about users, groups and roles as they are the same in the Unix world, the commands and options that you should be aware of are the following
| Users | you can perform the following using the secureadmin command
|
| Groups | you can perform the following using the secureadmin command
|
| Roles | you can perform the following using the secureadmin command
|
| Domainuser | you can perform the following using the secureadmin command
|
| Diaguser | you can perform the following using the secureadmin command
|
| User password options | security.passwd.firstlogin.enable off |
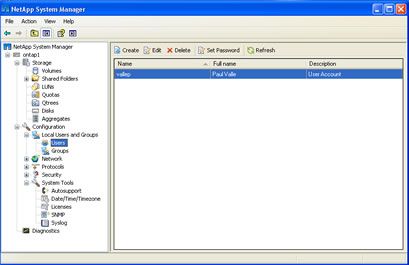
| System Manager GUI | The system manager can help with user and groups
|
| Change a users password | passwd Note: the passwd command will prompt you for the user to change |
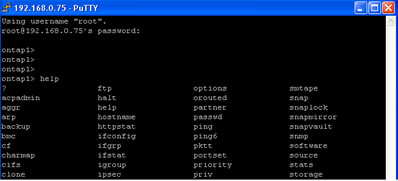
When you first login into a filer you are placed into a administrative shell that only allows a number of commands to be used (type help to display commands you can access), you can obtain more commands by using the advanced privilege, but on occasions you need a normal Unix shell prompt that allows you to access the normal Unix commands, this is called the systemshell and can be access by the diag user
| Access the systemshell | ## First obtain the advanced privileges priv set advanced ## Then unlock and reset the diag users password useradmin diaguser unlock useradmin diaguser password ## Now you should be able to access the systemshell and use all the standard Unix ## commands systemshell login: diag password: ******** |
There are a number of commands to get system configuration information and statisics
System Configuration |
|
| General information | sysconfig sysconfig -v sysconfig -a (detailed) |
| Configuration errors | sysconfig -c |
| Display disk devices | sysconfig -d sysconfig -A |
| Display Raid group information | sysconfig -V |
| Display arregates and plexes | sysconfig -r |
| Display tape devices | sysconfig -t |
| Display tape libraries | sysconfig -m |
Environment Information |
|
| General information | environment status |
| Disk enclosures (shelves) | environment shelf [adapter] environment shelf_power_status |
| Chassis | environment chassis all environment chassis list-sensors environment chassis Fans environment chassis CPU_Fans environment chassis Power environment chassis Temperature environment chassis [PS1|PS2] |
Fibre Channel Information |
|
| Fibre Channel stats | fcstat link_stats fcstat fcal_stats fcstat device_map |
SAS Adapter and Expander Information |
|
| Shelf information | sasstat shelf |
| Expander information | sasstat expander sasstat expander_map sasstat expander_phy_state |
| Disk information | sasstat dev_stats |
| Adapter information | sasstat adapter_state |
Statistical Information |
|
| All stats | stats show |
| System | stats show system |
| Processor | stats show processor |
| Disk | stats show disk |
| Volume | stats show volume |
| LUN | stats show lun |
| Aggregate | stats show aggregate |
| FC | stats show fcp |
| iSCSI | stats show iscsi |
| CIFS | stats show cifs |
| Network | stats show ifnet |
The NetApp extra features can be enabled by licensing the product, you can perform this either via the commandline or the system manager GUI
| licenses (commandline) | ## display licenses ## Disabling a license |
| licenses (GUI) | 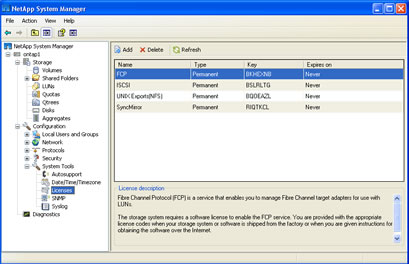 |
One very important configuration is the NTP service, this must be setup as it is important for snapshots.
| NTP setup (commandline) | ontap1> options timed |
| NTP setup (GUI) | 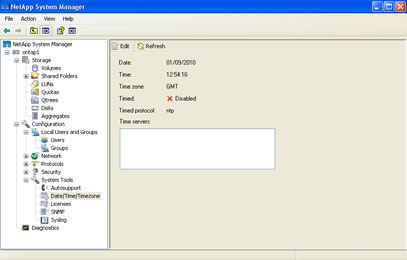 |